
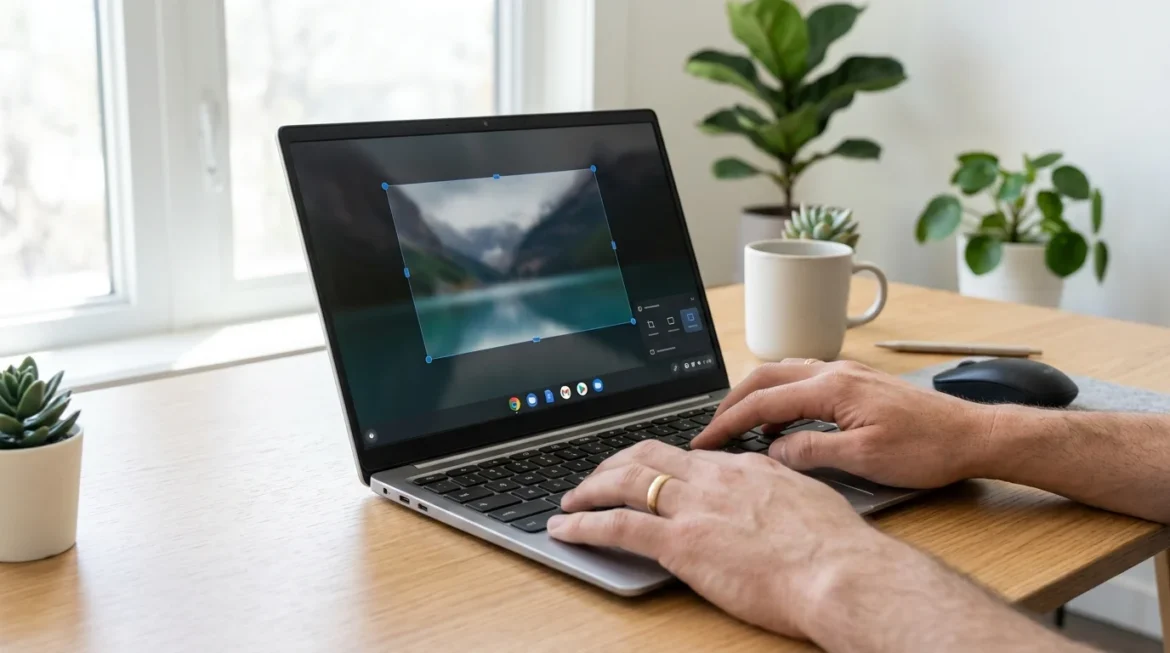
Switching to a Chromebook from a traditional Windows laptop or a Mac is usually seamless until you try to capture what is on your display. If you are searching for a dedicated key labeled PrtScn, you will quickly notice that Google designed ChromeOS keyboards with a streamlined layout that leaves out standard function keys. Capturing your screen on ChromeOS is fast and flexible once you know the right buttons. Whether you need to save a receipt, document a software glitch, or grab an image for a school project, learning how to screen print on chromebook takes only a few seconds.
Quick Answer (Featured Snippet):
To screen print on a Chromebook instantly, press Ctrl + Show Windows (the rectangle key with two lines on the top row) to capture the entire screen. Press Shift + Ctrl + Show Windows to open the snipping crosshair and select a specific area. On 2-in-1 tablets, press the physical Power + Volume Down buttons at the same time.
Understanding Screen Capture on ChromeOS vs Traditional Keyboards
Why Chromebooks Lack a Print Screen Button
Traditional Windows laptops feature an entire row of dedicated utility keys, including Print Screen, Scroll Lock, and Pause Break. Google eliminated these legacy buttons to create a minimalist layout focused on web browsing and productivity. Instead of a single key that copies raw pixels to a hidden clipboard, ChromeOS integrates screen capturing directly into its core operating system through versatile multi-key combinations and interactive menus.
Identifying the Show Windows and Overview Keys
The most important button for screen capture is the Show Windows key, sometimes referred to as the Overview key or Window Switcher.
-
Where to find it: Look at the top row of your keyboard, usually sitting right above the number 5 or number 6 key.
-
What it looks like: It features an icon of a rectangle followed by two vertical lines on the right side, representing a main desktop window alongside stacked background apps.
When pressed on its own, this key brings up an overview of all active applications. When combined with modifier keys like Ctrl or Shift, it becomes the primary engine for snapping screenshots.
How to Screen Print on Chromebook Using Keyboard Shortcuts
Keyboard combinations remain the fastest way to record your display. Depending on how much of your desktop you want to capture, ChromeOS provides three native shortcuts along with a hardware shortcut on newer devices.
Method 1: Capturing the Entire Display
If you want to save every single element visible on your screen, including the browser tabs, shelf, and app windows, use the universal shortcut:
-
Press and hold the Ctrl key.
-
Tap the Show Windows key once.
-
Release both keys.
A visual confirmation will flash across your screen, followed by a preview notification in the lower-right corner. The system automatically saves the full-screen image as a high-resolution PNG file.
Method 2: Taking a Partial Screenshot with the Snipping Tool Shortcut
When you only need a specific paragraph, image, or section of a page without cluttering your capture with background tabs, use the ChromeOS equivalent of the Windows Snipping Tool:
-
Press and hold Shift + Ctrl together.
-
Tap the Show Windows key.
-
The screen dims slightly, and your mouse cursor turns into a crosshair icon.
-
Click and drag a bounding box around the exact area you want to save.
-
Adjust the perimeter handles if necessary, then click the Capture button located in the center of your selection.
This partial capture method saves you the extra step of cropping the image later in an editor.
Method 3: Capturing a Single Active App Window
If you are writing a tutorial or sending a message where you only want a clean snapshot of one open application, you can isolate it without grabbing the desktop background:
-
Press Ctrl + Alt + Show Windows.
-
ChromeOS activates the window capture mode.
-
Move your cursor over the specific window or dialog box you wish to grab; the selected area will highlight.
-
Click anywhere inside that window to snap the image.
Method 4: The Dedicated Screenshot Key on Newer Laptops
Many modern Chromebook models from manufacturers like HP, Lenovo, Acer, and Asus now include a dedicated Screenshot key on the top row. This key features an icon of a small camera inside a circle or a rectangle with a camera lens.
Pressing this single key launches the built-in ChromeOS Screen Capture toolbar immediately at the bottom of your screen, bypassing the need for multi-finger key combinations.
Screen Capturing on Different Hardware Configurations
Because ChromeOS runs on a wide spectrum of devices, from detachable 2-in-1 convertibles to desktop Chromeboxes, your capture method may vary depending on the hardware in front of you. Understanding how to screen print on chromebook across all device formats ensures you never get stuck without a capture option.
Taking Screenshots in 2-in-1 Tablet Mode
When using a convertible Chromebook folded back into tablet mode or a standalone ChromeOS tablet without a physical keyboard attached, standard keyboard shortcuts are unavailable.
-
Locate the physical hardware buttons on the outer frame of the tablet.
-
Press the Power button and the Volume Down button simultaneously.
-
Hold them briefly until the screen flashes.
This works identical to taking a screenshot on an Android phone and automatically captures the full screen into your local storage.
Using External PC or Mac Keyboards (The F5 Workaround)
If you connect your Chromebook or Chromebox to a standard desktop setup using an external Windows keyboard, you will not have a Show Windows key. In this scenario, standard function keys map directly to ChromeOS top-row functions:
-
Full-Screen Capture: Press Ctrl + F5.
-
Partial Region Capture: Press Ctrl + Shift + F5.
-
Window Capture: Press Ctrl + Alt + F5.
On Mac external keyboards, use Control + F5 (or Control + Fn + F5 depending on your Mac function-lock configuration).
Capturing with a Built-in Stylus or USI Pen
If your Chromebook supports active USI stylus input, you can take precise screen snips without touching the keyboard:
-
Tap the Stylus icon on the ChromeOS shelf (near the bottom right clock).
-
Select Capture screen for an immediate full snap, or choose Capture region.
-
Drag the pen tip across the exact portion of the glass you wish to snip.
-
Release the pen to finalize and store the image.
Using the Built-In ChromeOS Screen Capture Toolbar
If you prefer a mouse-driven interface over memorizing hotkeys, Google built a comprehensive graphical toolbar directly into the operating system.
Launching from the Quick Settings Menu
-
Click the system clock in the lower-right corner of your desktop to open the Quick Settings panel.
-
Look for the Screen capture tile (an icon showing a square with a camera inside) and click it.
-
The interactive Screen Capture bar will dock at the bottom of your screen.
Toggling Between Screen Grabs and Screen Recordings
The toolbar gives you granular control over what and how you record:
| Control Type | Available Options | Function |
| Media Format | Camera Icon vs. Video Camera Icon | Toggle between capturing a still image or recording active screen video. |
| Area Selection | Full Screen, Partial Region, Specific Window | Choose whether you want the entire desktop, a dragged box, or a clean application frame. |
| Settings Gear | Audio Input, Camera Overlay, Save Location | Choose to include microphone audio, enable front-camera facecam, or change output folders. |
Once your preferences are selected, clicking anywhere on the screen or hitting the capture button executes the action instantly.
Where to Find and Manage Saved Screengrabs
One of the most common questions new users ask after learning how to screen print on chromebook is where the operating system stores the resulting files.
Locating Files in Downloads and the Shelf Tote
By default, ChromeOS does not drop your screenshot onto the desktop background like macOS does. Instead:
-
Open the Files app (click the Launcher circle at the bottom-left and select Files).
-
Navigate to the Downloads folder in the left sidebar.
-
Your captures appear here, labeled automatically with the date and exact timestamp (for example,
Screenshot 2026-08-30 14.15.22.png).
Additionally, ChromeOS features a handy shelf feature called Tote, located right next to the system clock. Tote automatically pins your most recent screenshots and downloads into a small thumbnail carousel for instant drag-and-drop access into emails or web apps.
Instant Pasting with the ChromeOS Clipboard Manager
Whenever you take a screenshot, ChromeOS automatically places a copy of that image onto your virtual clipboard while saving the physical file to disk.
If you want to paste a screenshot taken a few minutes ago without opening the Files app:
-
Press Launcher + V (or Search key + V) to open the native Clipboard History.
-
Browse through the last five copied items, which include text snippets and screenshot previews.
-
Click any image to paste it directly into your active document, email draft, or chat window.
Changing the Default Save Location to Google Drive
If your internal device storage is small, you can instruct ChromeOS to route all future screenshots directly to cloud storage:
-
Open the Screen Capture toolbar using Shift + Ctrl + Show Windows.
-
Click the Settings (gear) icon on the right side of the toolbar.
-
Under Save to, click Select folder.
-
Choose a specific folder inside your Google Drive directory or a dedicated folder in your local storage.
Editing, Annotating, and Extracting Text from Screenshots
ChromeOS includes built-in post-capture utilities that allow you to mark up images, crop out sensitive information, or copy text directly from a photo without installing third-party software.
Built-in Image Markup and Crop Tools
When a screenshot preview notification pops up in the bottom-right corner after a capture:
-
Click the Edit button on the notification card.
-
The image opens inside the native ChromeOS media viewer.
-
Use the top toolbar to crop unnecessary edges, rotate the orientation, or adjust basic brightness and contrast.
-
Click the Draw / Annotate tool to sketch arrows, circle specific UI elements, or use the highlighter tool to emphasize important text.
-
Click Done to commit your changes directly to the file.
Optical Character Recognition: Copying Text Directly from Images
ChromeOS features integrated Optical Character Recognition (OCR). If you take a screenshot of a non-selectable PDF, a scanned document, or an image containing text:
-
Double-click the screenshot in your Downloads folder to open it in the Gallery viewer.
-
Click the Select text button that appears automatically at the top of the interface.
-
ChromeOS scans the visual pixels and converts them into selectable text.
-
Highlight the detected words and press Ctrl + C to copy the text directly to your clipboard.
How to Physically Print What Is on Your Screen to Paper
Because the phrase “screen print” can literally mean transferring your current display onto physical paper using a printer, many users searching for how to screen print on chromebook want a hard copy rather than a digital image file.
Printing Webpages Directly with Browser Shortcuts
If you want to send the entire webpage you are currently reading to an attached wireless or USB printer:
-
Press Ctrl + P on your keyboard while the browser tab is active.
-
The Chrome print preview dialog will open.
-
Under Destination, select your connected printer (or choose Save as PDF).
-
Adjust pages, color settings, and margins, then click Print.
Printing Saved Screen Capture Files
If you have already captured a specific cropped screenshot and want to print only that image:
-
Open the Files app and navigate to your Downloads folder.
-
Double-click the screenshot file to open it in the Gallery viewer.
-
Press Ctrl + P inside the image viewer.
-
Confirm your printer selection and click Print.
Advanced Capture Workflows and Extensions
While native ChromeOS tools cover almost every standard use case, advanced tasks like capturing a tall scrolling article or managing team cloud shares benefit from specialized tools. Mastering how to screen print on chromebook with browser extensions unlocks full-page archival capabilities.
Capturing Full-Page Scrolling Screenshots
The built-in ChromeOS screen capture tool can only capture what is currently visible within the viewport borders of your monitor. If you need to grab an entire long article, spreadsheet, or webpage from top to bottom, install a dedicated extension from the Chrome Web Store:
-
GoFullPage: A one-click extension that automatically scrolls down the page, takes sequential snapshots, and stitches them together into a single PNG or PDF file.
-
Awesome Screenshot & Recorder: A versatile all-in-one tool offering full-page scrolling captures, cloud storage integration, advanced arrow/text annotations, and instant shareable URL creation.
-
FireShot: Excellent for archiving complete webpages directly into multi-page PDF documents.
Troubleshooting Common Chromebook Screenshot Problems
If your keyboard shortcuts fail or the resulting images look wrong, these straightforward fixes will get your capture tools running again.
Fixing Completely Black Screenshots on Streaming Platforms
If you try to take a screenshot of a movie or show on Netflix, Disney+, Hulu, or Amazon Prime and the output image is completely black with only subtitles visible, your hardware is working normally. This occurs because streaming platforms enforce Digital Rights Management (DRM) and Protected Media Path security, which deliberately blocks operating system screen capture engines to prevent unauthorized video recording.
To capture reference frames for educational reviews or fair-use commentary, disable hardware acceleration in your browser settings (Settings > System > Use graphics acceleration when available), or use official promotional stills provided by the content distributor.
What to Do When Shortcuts Do Not Respond or Storage Is Full
-
Check the Top-Row Key Mapping: Open
Settings > Device > Keyboardand verify that the top row of keys is functioning as dedicated utility keys rather than legacy F1 through F12 function keys. -
Verify Storage Space: If your internal SSD is at maximum capacity, ChromeOS will block new image creation. Open the Files app and delete unwanted downloads or move them to Google Drive to free up disk space.
-
Perform a Hardware Refresh: If key combinations remain unresponsive, press Refresh (circular arrow) + Power to perform a quick system hardware reset.
Dealing with School or Enterprise Administrator Restrictions
If your Chromebook was issued by a school district or corporate employer, your network administrator may have disabled screen capture via Google Admin Console policies to prevent data leaks during exams or sensitive operations.
If pressing Ctrl + Show Windows produces an alert stating “This action is disabled by your administrator”, the restriction is enforced at the policy level and cannot be bypassed without administrator approval.
FAQs
What is the shortcut to screen print on a Chromebook?
The standard shortcut to screen print on a Chromebook is Ctrl + Show Windows for an instant full-screen capture, or Shift + Ctrl + Show Windows to open the selection crosshair for a partial screenshot.
How do you take a screenshot on an Acer, HP, or Lenovo Chromebook?
The screenshot process is identical across all Chromebook manufacturers because ChromeOS controls keyboard shortcuts universally. Whether using an Acer, HP, Asus, Dell, or Lenovo device, press Ctrl + Show Windows or use the Power + Volume Down buttons in tablet mode.
Can you screen print on a Chromebook without a keyboard?
Yes. On 2-in-1 convertibles or tablets without a keyboard, press the physical Power + Volume Down buttons simultaneously. Alternatively, swipe down from the top right of the screen to open Quick Settings and tap the Screen capture tile.
Where do screenshots go on a Chromebook?
Screenshots are automatically saved to your local Downloads folder inside the Files application. They also appear in the Tote preview container pinned to the bottom right of the shelf next to the system clock.
Why is there no Print Screen button on my Chromebook?
Chromebook keyboards follow a streamlined design that replaces traditional PC function keys with dedicated ChromeOS navigation buttons. The Show Windows key replaces the traditional Print Screen key when paired with Ctrl.
How do I take a scrolling screenshot on ChromeOS?
ChromeOS does not have a native scrolling capture tool. To capture an entire webpage beyond the visible screen, install the GoFullPage or Awesome Screenshot extension from the Chrome Web Store.
How do you copy a screenshot directly to the clipboard?
ChromeOS automatically copies every taken screenshot to your system clipboard. You can paste it immediately into any document with Ctrl + V, or access your last five captures by pressing Launcher + V to open the Clipboard History.
Mastering how to screen print on chromebook comes down to using the right combination of hotkeys and built-in ChromeOS tools for your specific workflow. Whether you stick with fast keyboard shortcuts like Ctrl + Show Windows, utilize the on-screen toolbar for custom snips, or rely on OCR to extract text from images, ChromeOS provides a powerful set of screen capture features tailored to any task. Now that you understand how to screen print on chromebook across laptops, tablets, and external keyboards, you can capture, annotate, and share your screen content with complete confidence.